
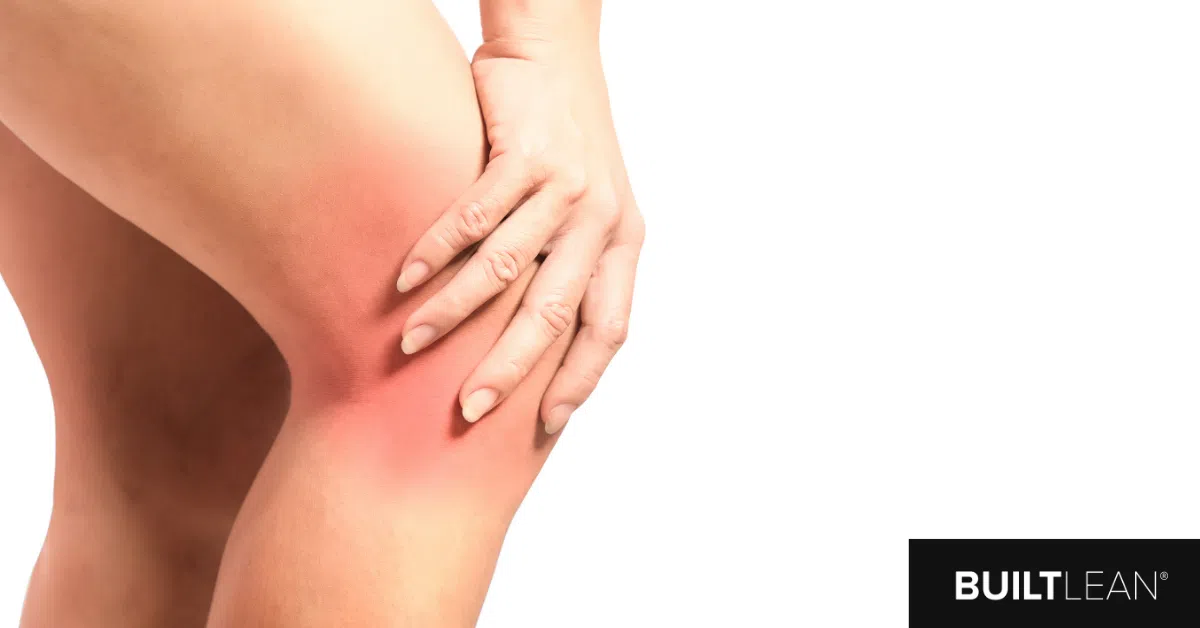
Were you just starting to get into plyometric training, or back into your favorite sport, when the front of your knee began hurting? There’s a good chance your patellar tendon is inflamed.
Patellar tendinitis (frequently spelled as tendonitis) is one of the most common sources of leg pain in athletes. Also known as “jumper’s knee”, this overuse injury is particularly common among basketball and volleyball players.
Anatomy of the Knee
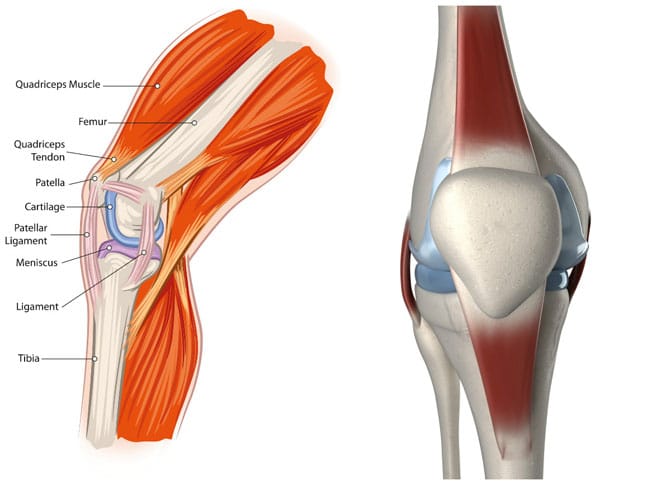
Technically, the patellar tendon is a ligament that links the front of the knee (patella) to the shin bone (tibia). It works in conjunction with the quadriceps muscle to extend the knee. The knee complex functions like a 3rd class lever or a pulley – it helps the quadriceps muscle straighten the knee more efficiently.
Generally, the deeper the knee bends and the further the knee goes in front of the body, the more force the quadriceps and patellar tendon have to exert to pull the knee straight again.
Symptoms of Patellar Tendinitis
Clinically, patellar tendinitis presents as localized pain and dysfunction in the patellar tendon, which is just below your patella (knee cap). While anyone can develop symptoms from common exercises like stair climbing and squatting, it’s much more common in athletes who play sports or do activities that involve a lot of jumping.
Early on, when symptoms are new and acute, a lot of the pain involved in patellar tendinitis comes from inflammation. If symptoms progress, changes may occur in the collagen of the tendon, leading to chronic pain (tendinopathy).
Here’s a list of common symptoms:
1. Local, sharp pain at the patellar tendon.
2. Increased symptoms with use of the quadriceps, or extending the knee (resisted knee extension).
3. Initially, pain might only be present when you first begin your workout or just after intense physical activity, but may progress to longer-lasting pain if the tendon gets inflamed.
Focus on Knee Alignment
The goal with these exercises is re-education. Before we get to the exercises though, here’s a critical tip you should keep in mind:
Be aware of your knee alignment!
Practice doesn’t make perfect. Perfect practice makes perfect.
For most people, the center of your knee should point towards and be in line with your 2nd or 3rd toe. If the knee goes inwards, your quadriceps and IT-Band will pull the kneecap to the side, causing an asymmetric strain to your patellar tendon.
As you begin to reload the knee joint, practice squatting and lunging with perfect form. Check your alignment throughout every exercise, and especially as you begin to add speed to the movements.
Strength Exercises
1. Eccentric Single-Leg Decline Squats
The goal of this exercise is to spend a larger amount of time with tension on the tendon. When performed eccentrically, the quadriceps muscle is able to resist with more force. This exercise should be performed until the quadriceps is exhausted, so if you can easily do single leg squats with your bodyweight, start wearing a backpack or weight vest to increase the load.
Complete 3 sets of 15 reps, twice per day.
It’s ok if the decline squats hurt a bit, but the pain should not be excruciating and it should not get progressively worse as you proceed through your reps and sets. Also, if you wake up the next morning and your knee feels worse than it did the day before, lighten the load.
Early on, if the pain is increasing, you can do an easier isometric hold. Try a simple wall squat, holding for 45 seconds, and complete 3 sets. This will allow you to put tension on the patellar tendon without aggravating it.
** If you lack adequate ankle flexibility, you can use a decline ramp to slightly elevate your heel.
2. Squats
Perform 3 sets of 10 reps, practicing squats in varying positions and angles. Pay extra close attention to your form.
3. Lunges
Perform 3 sets of 10 reps. Practice lunges in varying positions and angles, paying extra close attention to your form. Perform forward lunges, reverse lunges, side lunges, and diagonal lunges.
4. Jump Rope
Perform 3 x 1 min of jump rope as a warm-up before any physical activity.
The focus here is on ankle training and landing softly.
When jumping, focus on landing softly, which means rolling toe-ball-heel down your foot as you land from jumping. Also, your knees should remain slightly bent throughout the exercise. Studies have shown that when athletes land softly from a jump, more of the forces are absorbed in the ankle musculature, which decreases the peak ground reaction force that occurs in the knee.
Flexibility Exercises
An important part of rehabbing patellar tendinitis is flexibility. This is because tight quad and hamstring muscles have been correlated with patellar tendinitis. Therefore, you should definitely stretch the muscles around the knee in your rehab program. Perform these stretches after you warm-up and again after your workouts.
5. Rectus Femoris Stretch
Start in a half-kneeling position with one foot forward and one knee down. Place your back foot up on the wall or on a bench. Tighten your abs and push your pelvis forward without excessively arching your back. Hold for 30 seconds, repeat 3x.
6. Hamstring Stretch
If your hip hinge form is perfect, hold this position for 30 sec, 3x.
If you’re not confident in your hip hinge form, the easiest stretch to do is the hurdle stretch. Instead of reaching for your front foot with your hands (which may cause you to round your back), try to push your belly button to your knee instead. Hold for 30 seconds, repeat 3x.
7. Ankle Stretch
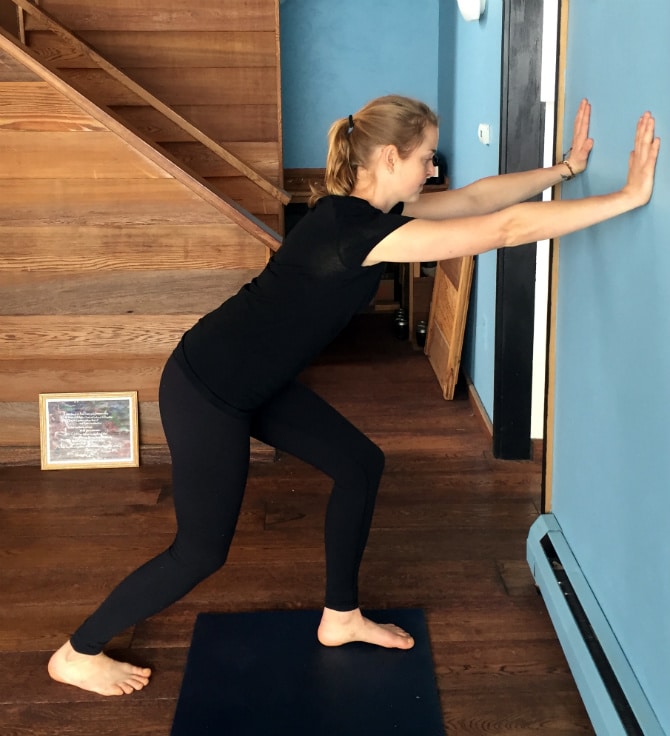
Hold this stretch for 30-60 seconds on each leg.
Poor ankle mobility can lead to poor form up the kinetic chain. Properly stretch the ankle with this stretch prior to doing any activity where your knees may go in front of your toes.
Just like your squat and lunge mechanics, this stretch should be done with optimal alignment of the knees and toes.
Patellar Tendinitis FAQs:
Why did you develop patellar tendinitis?
A combination of genetics, activity level, and quality of movement affect your likelihood of developing patellar tendinitis. While you can’t do much about your genetics, you can definitely influence the latter two.
When it comes to activity, make sure that you give your body adequate rest after heavier, more intense workouts. A little bit of stress is great for the body, as it signals your muscles and connective tissue to get stronger. But too much stress without adequate recovery leads to accumulated micro-tears, which can then lead to pathology and injury.
In addition to total activity level, how you move also plays an important role. Excessively and repeatedly bending your knees in front of you puts a large load on the knee complex. Also, performing leg exercises with poor mechanics (like letting the knees collapse inward) changes the direction of the pull on the patella, leading to increased strain on different parts of the tendon. If you’re new to strength training or working out, consider working with a competent therapist or personal trainer who can teach you the right way to perform your exercises.
Should I do physical therapy for patellar tendinitis?
The most cost-effective treatment for patellar tendinitis is physical therapy. A physical therapist can help you improve your movement mechanics and modify your activity level to find the right balance between strengthening and resting.
The best and most comprehensive summary of how to treat tendinopathies is summarized as EdURep. If you’re interested in an in-depth read (and for anyone in the health industry), this will give you a basic understanding of how to treat tendon pathologies.
EdURep is an acronym that stands for: Educate, Unload, Reload, Prevent. It’s a step-wise system to rehabbing tendon pathologies. Let’s break the process down.
1. Educate
The first step is to understand what’s going on (which you’re doing right now!). Learn how to modify your activity level and know that, while you may not be as invincible as you were when you were 18 year old, your pain won’t last forever.
2. Unload
The next step is to adequately decrease your exercise and activity level so that you minimize the amount of damage to the tendon and give it time to heal. You can still work on your flexibility with the specified stretches, and you can start strengthening the musculature in the hips and ankles.
This is important: Don’t play through pain! The sooner you stop aggravating the tendon, the sooner your healing will occur.
If there are any signs of inflammation, you can also consider taking over the counter anti-inflammatories or do therapeutic icing.
When the tendon is in this painful, reactive stage, you can perform isometric holds as mentioned above. This will help to prevent excessive atrophy of the tendon without aggravating it. Recommendations are for long holds of about 45-60 seconds.
3. Reload
At this point, your knee symptoms should be under control, and you can begin to incrementally load the patellar tendon with specific exercises. Just like muscles, tendons need to be placed under load in order to strengthen them. The key is the kind of load – eccentric strengthening is considered the gold standard for rehabilitating tendons in the lower extremities as it allows you to use even more weight than you may be able to resist otherwise.
4. Prevention
To minimize the chance that these symptoms return after your recovery, you’ll want to make sure that you have:
• Adequate hip strength to generate power.
• Proper shock absorption techniques in your ankles and calves.
• Perfect jumping and squatting mechanics so you can maintain optimal alignment.
Adequate rest between exercise sessions to allow for full recovery.
What Are Some Alternative Treatments for Patellar Tendinitis?
1. Patellar Tendon Strap: This strap is one of most common over-the-counter support braces, and it’s purpose is to help distribute the stress along the entire tendon. This cheap solution is worth trying, and allows some athletes to exercise pain-free when they otherwise wouldn’t.
2. Minimal Shoe / Footwear: Use a shoe with a lower heel-to-toe drop. A higher heel can cause the knee to travel forward excessively, which increases the tension on the patellar tendon. If you currently use a shoe with a higher heel-to-toe drop, consider getting a shoe with less of a heel drop or try a minimal shoe.
3. Platelet-rich Plasma Injection / Extracorporeal Shockwave Therapy: These two treatments are lumped together because the scientific research supporting them is still mixed. Some orthopedists swear by them, and some say they make no difference. Neither treatment is covered by insurance, so the costs are generally covered out-of-pocket by the patient. Before deciding on these treatments, I would exhaust your other cheaper options and try physical therapy first.
4. Corticosteroid injection: While great at reducing local inflammation, a steroid injection may simultaneously limit healing and cause further tendon degeneration. If your orthopedist has determined that you would benefit from a steroid injection, make sure not to load the tendon too quickly afterwards. Make sure to give the tendon time to recover and heal.
The one big thing I haven’t mentioned yet is the idea to “keep your knees behind your toes”. This form cue is an over-simplification of proper movement mechanics. It’s natural for your knees to go in front of your toes with certain movements. Look at anyone who walks down stairs or jumps. The key is in limiting movement of the knees in front of the toes when your knee is in pain. Exercises like the wall squat were specifically developed to follow this rule, and yet they can load your patellar tendon and knee joint more than heavy deadlifts can. While your knee may be behind the toes in these exercises, your weight is very far behind the knees, and thus placing a large load on the knee joint. It’s more important to make sure that your knees are in proper alignment with your 2nd or 3rd toes.
Do you have any lingering questions about patellar tendinitis? Reach out in the comments below.